If you haven’t gone through that step yet, I highly recommend taking a few minutes to review and follow all the important details. It’s crucial to ensure everything is in order before submitting.
If you are picked from the IEC Pool, you will receive an e-mail notification.
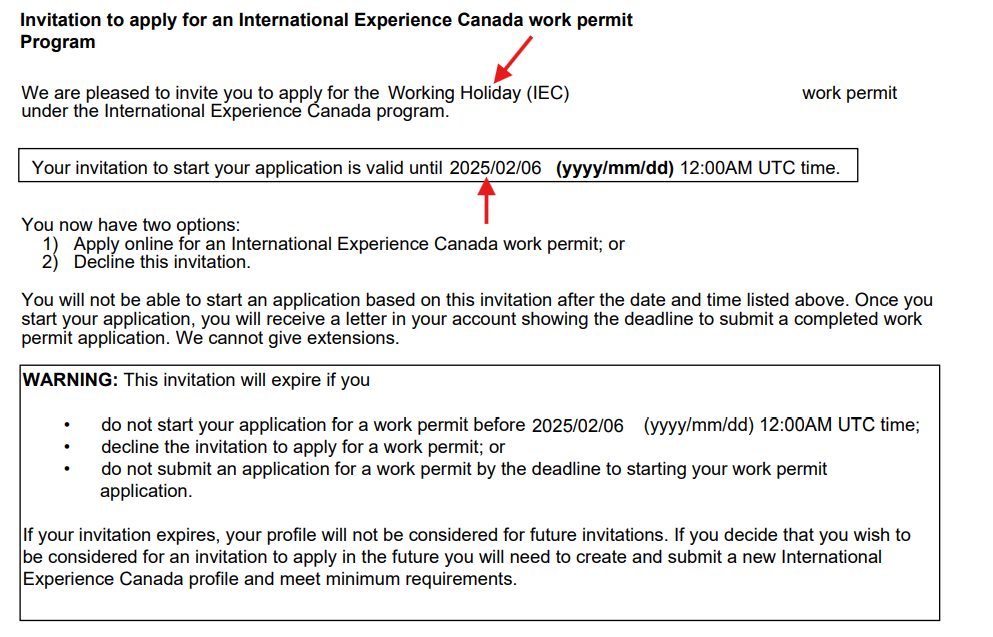
Log into the GCKey Account and under “Messages about your IEC profile” find the IEC Invitation to Apply Letter
Click the link and it will open or download as a PDF.
It will mention the category you are invited and the deadline. This deadline is crucial!
Once you've accepted the invitation, you have another 20 days to upload all the documents.
If you miss this deadline, you will receve a refusal, and you must re apply into the pool again.
The government’s system is very glitchy. Please do not wait until the last day of the deadline. Accept the invitation no later than day 8 of 10 and submit the request no later than day 18 of 20.
If you have trouble logging into your account, try those solutions:
Keep trying, and trying,
delete cookies,
use several other browsers, including the Brave browser, or CCleaner browser
use incognito mode/private window,
use another device
try another time because the site is overloaded.
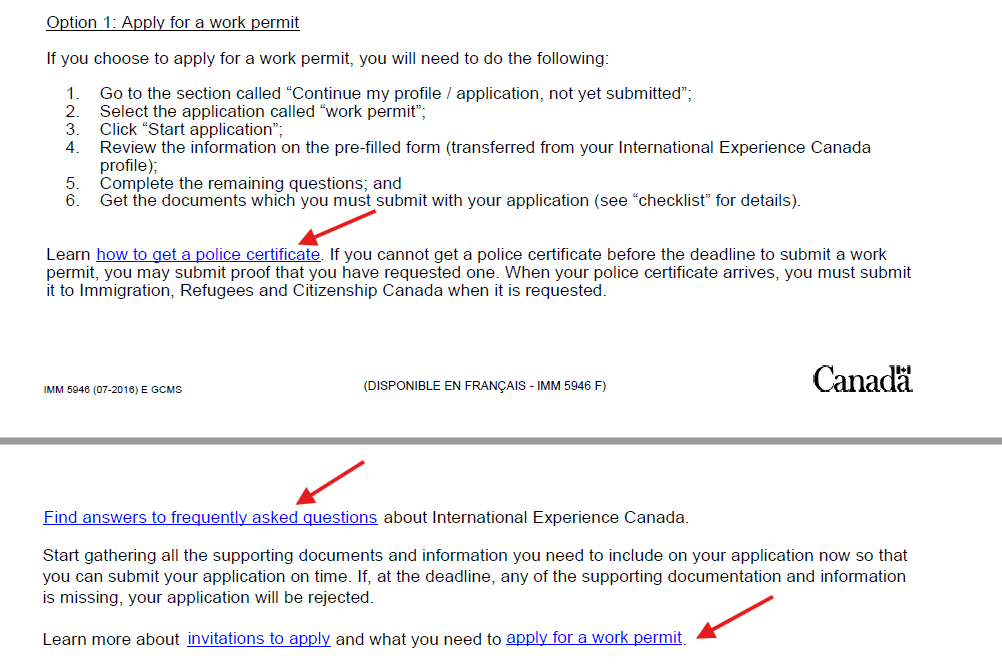
Below is a screenshot of the 2 page “Invitation letter” that contains a lot of links. Click those links and read them.
Below, I’ll highlight a few key steps and show screenshots of the application process. I’ll skip over the self-explanatory steps, as they’re straightforward and easy to follow.
Accept the invitation with “Start Application”.
As soon as you click this link, the 20 days deadline starts.
After you clicked “Start application” you will automatically receive a new notification and PDF named “IEC Notice to submit letter”, with the 20 day deadline.
Please note two important things:
The deadline is in UTC time which could be different than your local time. Example to remember the time easier:
If you accept your invitation with “Start application” at 7:25 a.m., you must submit your IEC work permit application before 7:25 a.m. 20 days later.
Don’t wait until the last day to submit your application. The IRCC system is very faulty and you could miss the deadline.
eService
On the eService screen, you’ll need to start by filling out all the forms using the “Continue Form” button on the right.
Go through each form one by one, filling in all required information. Don’t forget to save your progress after each section. Once saved, you can always go back and make changes or add missing details.
You’ll only be able to proceed to the next step (the document list) once all 4 sections are completed.
In the passport section (shown in the screenshot below), do not enter your passport details again, as your passport information has already been saved in the system when you created your profile. You’ll see this clearly at the bottom of the screenshot.
Answer ‘no’ to the question “Do you have a National Identity Document” if you have a passport.
This question is only important for countries that don’t have a passport.
In the question (shown below in the screenshot), you need to list any trips to other countries where you stayed for more than 6 months at a time. It’s the duration of your stay that matters, regardless of whether you were there as a tourist, worker, or student.
If you didn’t travel outside of your country for more than 6 months in a row, leave the default “No”.
If this is your first IEC application, answer ‘no’ to the question asking if you’ve ever applied for or obtained a visa.
If you’ve previously been to Canada on a work permit, study permit, or visited with an eTA, you must answer ‘yes’. The UCI, eTA, or permit number is optional. If you don’t know the number, you can leave the field blank or enter “NA”.
If you haven’t followed that step, grab a piece of paper and write down your history in chronological order first. Once you have it, transfer the details into the application form. Include all jobs and all unemployment and without any gaps.
Important: The Work History section asks for your jobs over the past 10 years, but you must list everything from the age of 18 onward.
If a specific job isn’t listed, just select the closest match from the options provided.
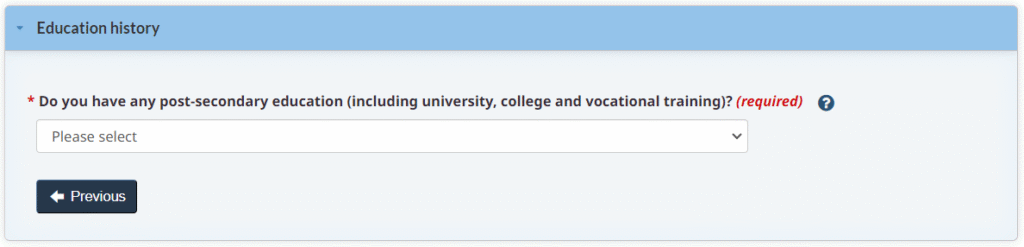
Education History
Only the periods after high school must be listed.
This includes any vocational training, university degrees, certification programs, or any other higher education you have attended or are currently attending.
If you hold only a high school diploma and have not pursued any further education, you may simply answer “No” to this question. In this case, you will not need to fill out this section.
If you began post-secondary studies but did not complete them, or if you did not receive a degree or diploma, you are not required to include this information in your education history. However, you should ensure that you list your ‘student’ years under the work history section to cover any gaps in your timeline.
Application Details
If you have never participated in the IEC program before answer ‘no’ to this question.
If you are applying for another Working Holiday or another category like the Young Professional, answer ‘yes’ and enter the date when you activated the work permit at the border.
Under “Type of work permit,” make sure the correct category is selected. If you applied for the Working Holiday program, the category shown should be Working Holiday.
If a different category appears than the one you applied for, you must stop and withdraw the entire profile, then create a new profile in the correct pool and wait for an invitation for the appropriate category.
A very important question in the above screenshot will determine if you need to undergo a medical exam.
More information on medical exams can be found > here < in an extra info post.
In the next screen, answer all the background questions. (I didn’t screenshot them).
You will only get to the next step, (to the document list) after you have completed all 4 categories in the eService and they are set to “Complete”.
Then you will also see the important “Continue” button and can go to the next step.
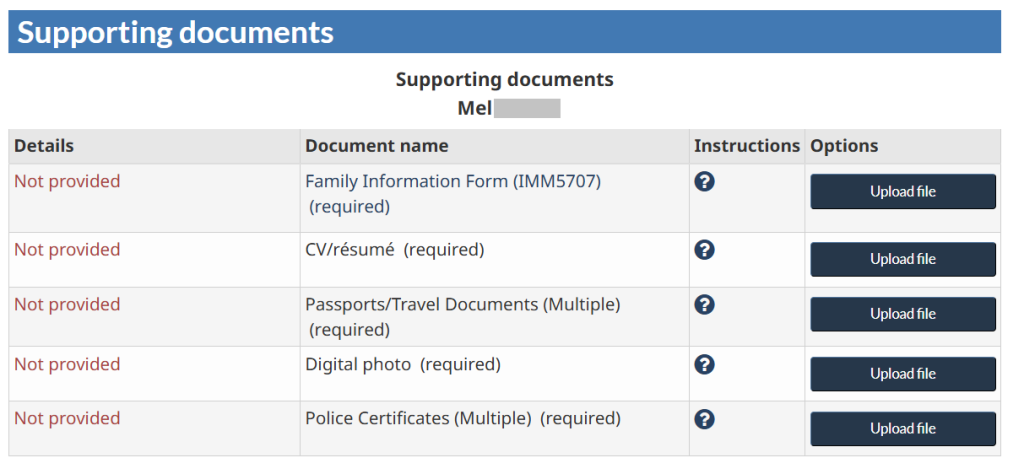
Supporting documents
Now upload all documents that are required in your document overview. If you have followed the instructions in this step of the application guide the upload will only take a few minutes.
If you’re having trouble downloading the Family Information Form IMM5707, >here< are the instructions and one of the solutions will work.
The IMM5707 form only needs to be completed, saved, and uploaded again using a PC. It does not need to be signed, even though the form shows a “Signature” field at the bottom. Don’t worry—during the application process, everything is signed and submitted electronically automatically.
If you have multiple police certificates, you must merge them into one file because you only have one spot to upload.
You can use a PDF Merger from the Internet, like > this one <
The files cannot exceed 4MB.
The following file formats are accepted: PDF, JPG, TIFF or PNG (image), DOC or DOCX (Word document).
If your files are too big, you can compress them with an app. For example > this one <
Only after all the documents have been uploaded, you will see the next part of the application.
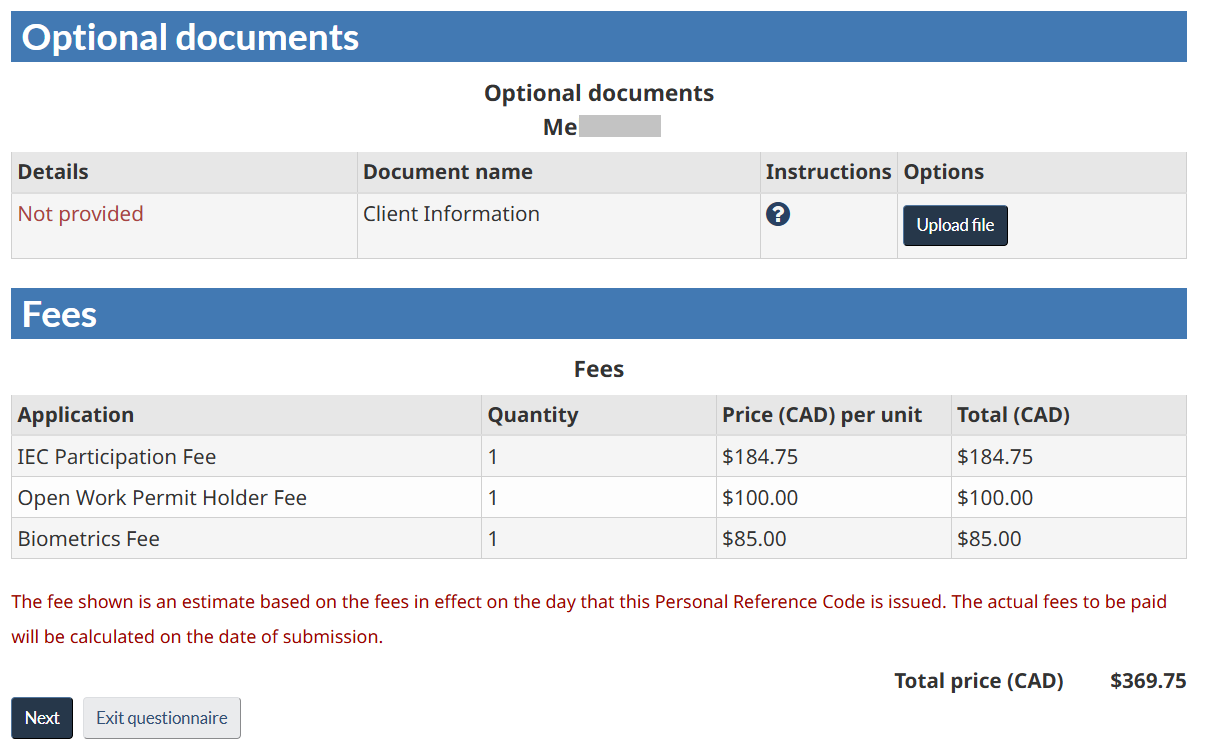
The screenshot below displays the application fees for 2026.
The “Optional documents” section is not mandatory.
You only need to upload a document there if you wish to provide additional information to the processing officer regarding your application.
For example if you have to write a short explanation to let the processing officer know more about a certain situation.
One example: if you can’t get a police certificate in time, you can write a short explanation that you applied for the police certificate and need more time.
The “Next” button will also appear at the left hand side allowing you to proceed to the next step in the application.
Declaration
In this step, you’ll need to check and confirm your provided information.
Even though the documents are uploaded, it’s normal for the status to show “Uploaded – Not submitted to IRCC”.
Don’t worry—everything will be automatically submitted to IRCC once you complete the entire application process, including the payment.
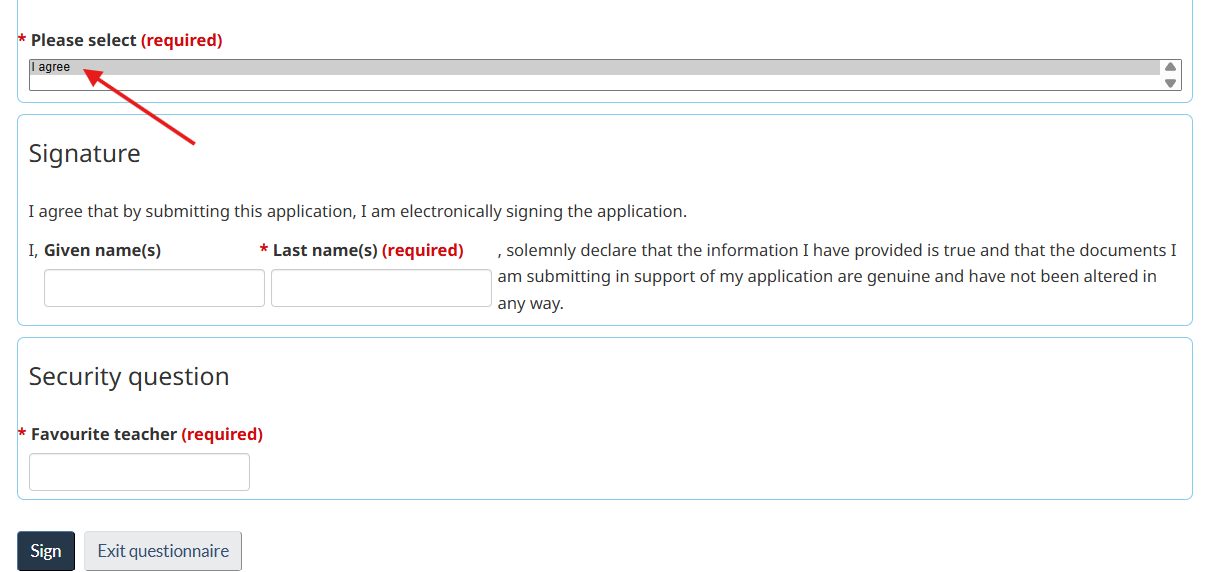
Click “I agree”
Enter your name and your answer to the security question.
Finally, click “Sign.” This electronic signature confirms that all the information you provided is true.
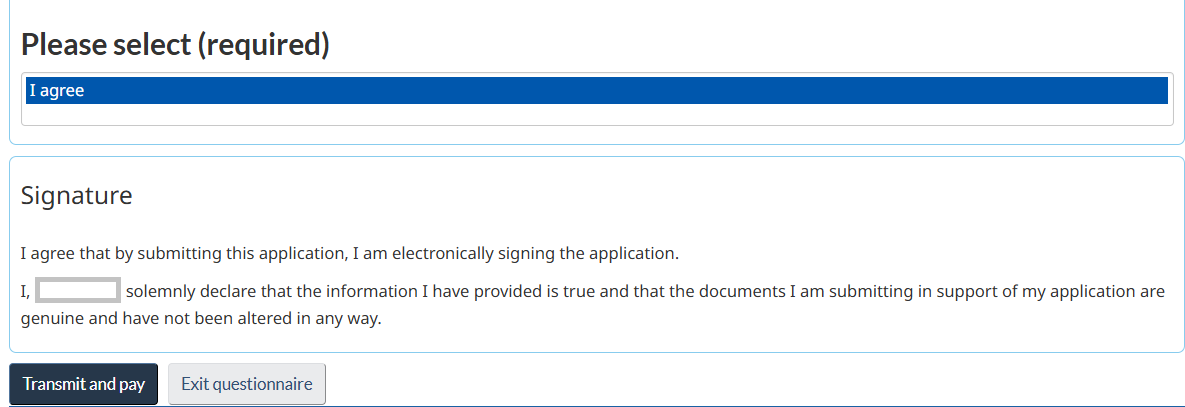
On the next page scroll down and read all the important parts of the Disclosure (no screenshot).
Then click “I agree” so it turns blue.
Finally, click “Transmit and pay.”
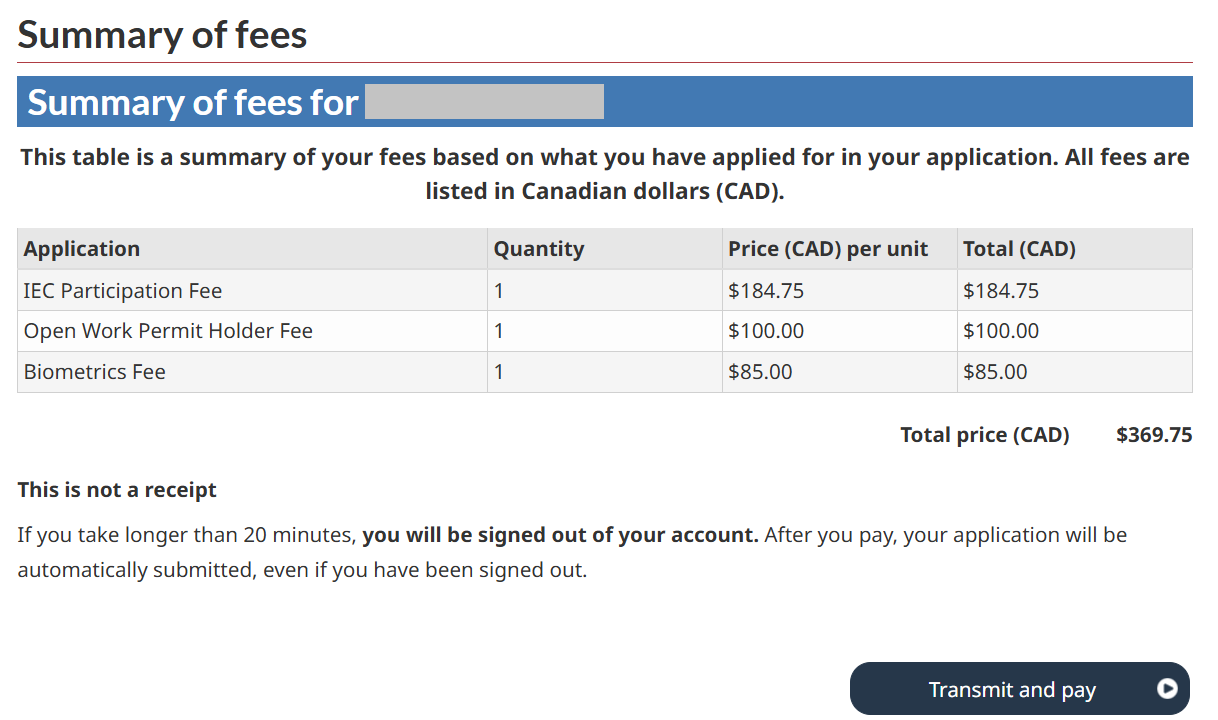
Summary of fees
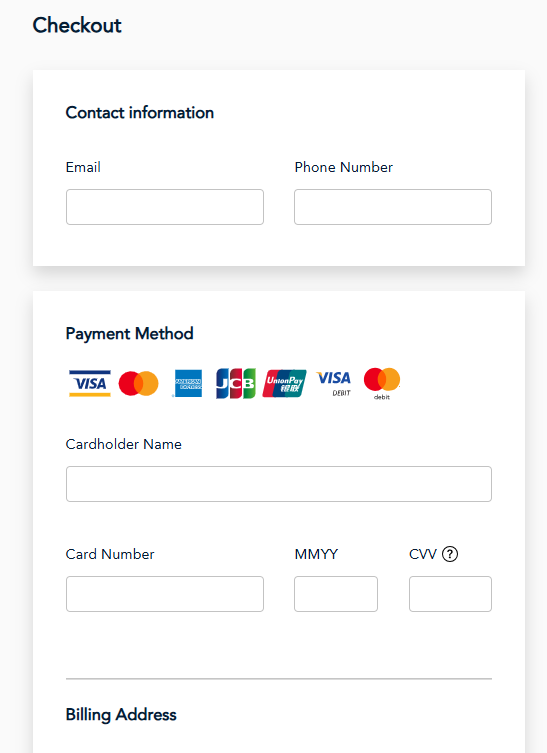
In this final step, you pay the fees.
The credit card used to pay the fees does not have to be in your name. The cardholder’s name will appear on the receipt, but it doesn’t need to match the name on your application. So, you can use a family member’s or friend’s credit card to complete the payment.
You will be redirected to a secure external site to process the payment.
If you cancel the transaction and return to your account, the “Transmit and Pay” button may disappear temporarily. Don’t worry—it will reappear within 24 hours, and you can attempt the payment again.
Once you’ve paid the fees, that’s it—you’ve successfully completed your application process.
Congratulations, you made it!
Account E-Mails
Throughout the application process, you’ll receive email notifications in your account.
There are two types of emails: one can be ignored, while the other is a genuine message or request.
Important! Due to the rise of scammers and phishing attempts, never click on any links in unsolicited emails. Always log in directly through the IRCC homepage on your computer or phone to check your status or messages.
"Your application status has changes." You can ignore this message because something only happened in the background. You will not find any messages in your GCKey account
"A message about your application is waiting for you." This is real! You will find the message and request in your GCKey account